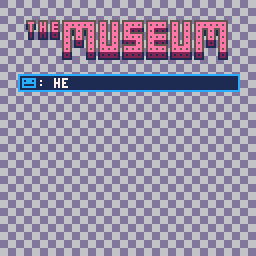
The theme this time around was Ancient Technology. I took part in the 48 hour compo to create The Museum, a comedic game where you play as a museum tour guide but don't know what the exhibits are and just make it up as you go. It's pretty funy and quite short, so go play it first if you haven't already.
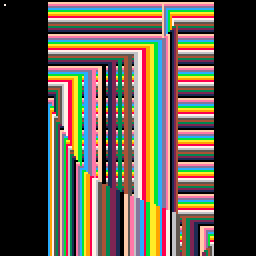
There were two major parts to creating The Museum: art and writing. First I'm going to talk about the art, then the writing. Here's a timelapse:
Art
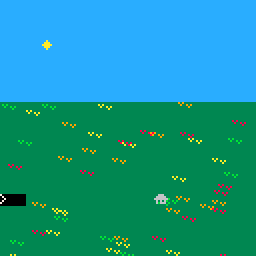
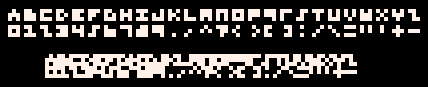
Because this is a PICO-8 game the resolution is 128x128 and it uses the standard 3x5 pixel font (with special 7x5 wide characters) and strict 16-color palette. Here's a look at the game in action:
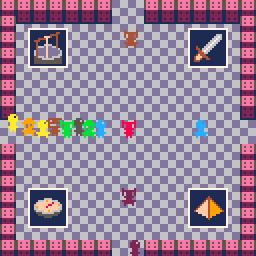
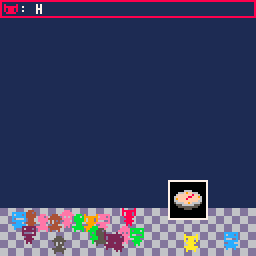
The Museum Hall
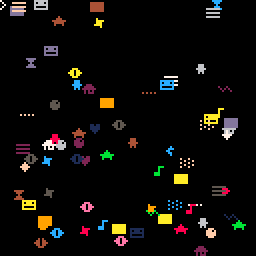
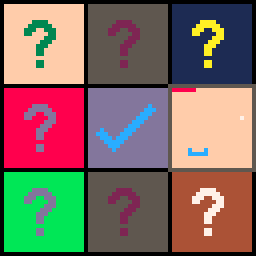
I made a very simple tileset for the museum using standard-sized 8x8 sprites. This is what the first page of the sprite bank looks like:
I made a very simple tileset for the museum using standard-sized 8x8 sprites. This is what the first page of the sprite bank looks like:
The top left sprite is the 'empty' sprite reserved by the PICO-8. Next to that is the checkerboard used for the floor. The walls of the museum are 8x12 pillars and therefore use two sprites (the last 4 pixels of the lower sprite are a repeat of the floor pattern so that they line up nicely). I tried several 8x16 pillars which you can see along the bottom.
The shading on the pillar creates a nice sense of depth which can be improved with some clever collision detection and sprite rendering. For example, below is a GIF of the player walking along the top and bottom of the museum. At the top of the screen the player is rendered in front of the pillars which makes it look like they can walk right up to the edge of the wall. At the bottom they're rendered behind the pillars which gives the walls a tangible height and place in the world.
The shading on the pillar creates a nice sense of depth which can be improved with some clever collision detection and sprite rendering. For example, below is a GIF of the player walking along the top and bottom of the museum. At the top of the screen the player is rendered in front of the pillars which makes it look like they can walk right up to the edge of the wall. At the bottom they're rendered behind the pillars which gives the walls a tangible height and place in the world.
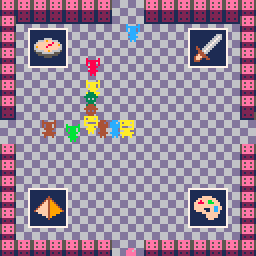
The Exhibits
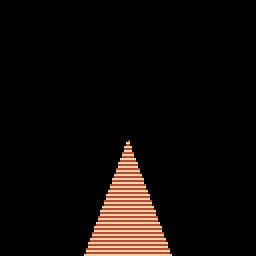
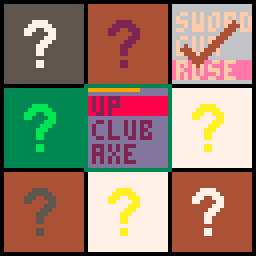
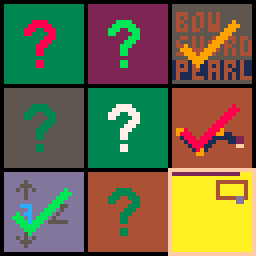
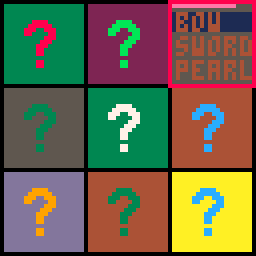
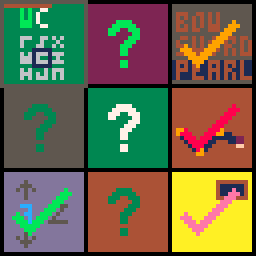
You can see all 6 of the exhibits in the spritesheet above. They were drawn from left to right as I finished the writing for each one: sword, pyramid, compass, well, floppy disk and paint palette. Each one is 16x16 and came out better than I was expecting.
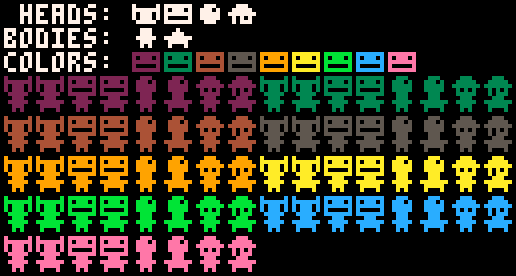
The People
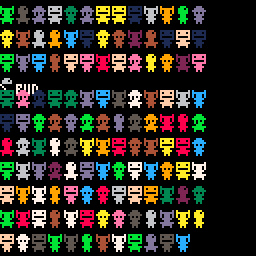
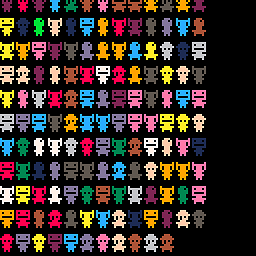
All of the people are randomly generated using some of the special wide characters in the PICO-8 font. There are 4 possible heads, 2 bodies and 9 colors giving 72 possible combinations. With all 16 colors there would be 128 combinations but some of the colors blended with the environment too much or just looked strange so were omitted. The player is the only red character so that they can always spot where they are in the crowd. I first generated people like this as a submission for tweetjam.
You can see all 6 of the exhibits in the spritesheet above. They were drawn from left to right as I finished the writing for each one: sword, pyramid, compass, well, floppy disk and paint palette. Each one is 16x16 and came out better than I was expecting.
The People
All of the people are randomly generated using some of the special wide characters in the PICO-8 font. There are 4 possible heads, 2 bodies and 9 colors giving 72 possible combinations. With all 16 colors there would be 128 combinations but some of the colors blended with the environment too much or just looked strange so were omitted. The player is the only red character so that they can always spot where they are in the crowd. I first generated people like this as a submission for tweetjam.
When you're in the hall there are people wandering around heading to the top, bottom, left or right edge of the screen. Once they go offscreen another random person is generated and picks a side to enter from. In an exhibit they just go between the left and right edges.
For the tour itself there are a small group of people who follow you around. This is pretty simple: the position of each character is just the previous position of the character in front of them. Here's a good example. In my case each character actually stores their last 5 positions (to create a gap/delay between them) and the positions are only copied when they're moving (so they don't all stand on top of each other). All the characters also have a small random offset each frame to make them fidget a bit.
The Transitions
There are 3 different scenes in the game: the title screen, main hall and exhibits. To smooth the transitions between them there's a quick screen wipe. This is just a rectangle which stretches from the right side of the screen to the left, at which point the whole screen is black so we can safely change scenes, before shrinking it back from right to left. The whole thing lasts just 1 second.
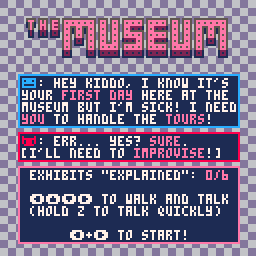
The Title Screen
The title screen serves a number of purposes: it tells players the name of the game, explains what they have to do, tracks their progress and tells them which buttons to press. I was so happy with the pillar sprite that I based the title graphic on it, then moved it up and down gently on a sine wave so there's always something happening on the screen.
The title screen serves a number of purposes: it tells players the name of the game, explains what they have to do, tracks their progress and tells them which buttons to press. I was so happy with the pillar sprite that I based the title graphic on it, then moved it up and down gently on a sine wave so there's always something happening on the screen.
Writing
How Text is Structured
Each exhibit has 9 lines of text with 6-8 points where you can choose what to say from 3 options. Here's a snippet of code from the function which populates the exhibit array:
Each exhibit has 9 lines of text with 6-8 points where you can choose what to say from 3 options. Here's a snippet of code from the function which populates the exhibit array:
-------------compass
items[3]={}
items[3].sprite=6
items[3].lines={
 "\130: here we have a compass. it",
 "uses the power of $",
 "to always point $.",
 "the first $ were used",
 "for $ but were later",
 "adapted for $.",
 "you can make your own compass",
 "at home using only $",
 "$ and $."}
items[3].options={
 {"magnetism", "witchcraft", "astrology"},
 {"out typos", "at ghosts", "northwards"},
 {"compasses", "compii", "...ones"},
 {"divination", "decoration", "pranks"},
 {"navigation", "music", "cooking"},
 {"a needle,", "2 cats,", "prayer,"},
 {"a bowl", "some lard", "16 hours"},
 {"some water", "a dozen eggs", "meditation"}}
The .sprite field is the index into the sprite bank for the top left of the 2x2 block for that exhibit's art. The bulk of the text is in the .lines field separated into individual strings with dollar symbols ($) strewn throughout. Each $ corresponds to a set of 3 choices within the .options field. When you make a choice the $ at the current position is replaced with the string that you chose, so that by the end there are no dollar symbols left and the .lines field just contains your final speech. This means that if you leave and go back to that exhibit it will simply play your choices back to you. To reset the exhibit (such as at the beginning of a new tour) I simply call the array populating function again to restore all the $.
So for example if you correctly pointed out on your tour that a compass works using the power of witchcraft, it would look like this:
So for example if you correctly pointed out on your tour that a compass works using the power of witchcraft, it would look like this:
--before
items[3].lines[2]=="uses the power of $"

--after
items[3].lines[2]=="uses the power of witchcraft"
This means that all 3 options for any given choice need to be roughly the same length, because the string itself is being changed and lines are dealt with independently. There is no word wrap in this system. Lines are split such that they accommodate the longest possible choices and so having one comparatively shorter option would result in a lot of blank space at the end of a line, which would look weird.
How Text is Rendered
To animate the text there are a series of variables tracking what the current line, option and character are. Each frame the char counter is increased. When the current char is a $ we stop increasing the counter and wait for input (while rendering the current set of 3 options). Once a choice is made we substitute the $ for the chosen string, resume the char counter and increase the option counter so that the next $ will show the corresponding next set of 3. When the current char goes past the end of the line we reset it and increase the line counter, and finally when the line counter goes past our final line we know we're finished.
I actually lied a little bit earlier. When you make a choice the $ symbol isn't just replaced with your chosen string, that string is also wrapped in ^ symbols like so:
--before
items[3].lines[2]=="uses the power of $"

--after
items[3].lines[2]=="uses the power of ^witchcraft^"
These ^ act as signifiers to the line printing function so that it knows when to change colors. I wanted the text that you choose to stand out so that you can see exactly what your choices were. I also wrapped key words in the title screen dialog in ^ so that they too would be highlighted.
The print line function prints the given string one character at a time and tracks what the current color is. When a ^ is encountered the color is toggled and the character discarded. It also handles the special cases of printing the player and boss head wide chars in their respective colors.
function print_line(l,x,y)
  --text between ^ is diff color
  --player head diff color
  --boss head diff color
  local col=7
  for i=1,#l do
    local c=sub(l,i,i)
    if c==player_head then
      print(c,x,y,player_col)
    elseif c=="\140" then
      print(c,x,y,boss_col)
    else
      if c=="^" then
        if col==7 then
          col=14
        else
          col=7
        end
      else
        print(c,x,y,col)
      end
    end
    x+=char_width(c)
  end
end
The char width function simply returns 4 for normal characters, 8 for wide characters and 0 for $ and ^.
Cheers
Each time you make a choice a random member of your tour will have a little cheer in their color that floats upwards briefly. It really adds to the comedy, especially when you say something ludicrous. The 8 things they can say are: amazing!, wow!, incredible!, knowledge!, interesting!, fascinating!, really?! and informative!.
Reception
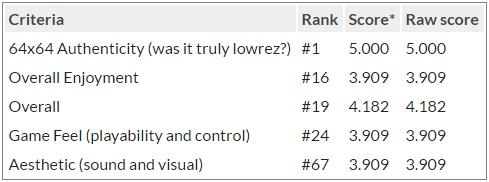
People seem to be really enjoying The Museum. Almost everyone says it's funny and a lot of people have complimented the art too, which is great since those were my two focuses. Some people have fairly pointed out that it could do with some sounds and perhaps music.
Larry Chupacabra and Jupiter Hadley recorded their playthroughs and these were great to watch. Larry really went to town on the improvisations and acting, which was cool. I especially loved hearing Jupiter start out picking the 'correct' options and then start to realize she can say whatever she wants and start to laugh and have fun with it. That's exactly what I was going for.
Overall I'm very happy with the game. Both the art and writing were big new challenges that I really wasn't sure I could do. The Museum was the first idea I really liked based on the theme but I didn't think I could pull it off, so I carried on brainstorming. I'm glad I went back to it and pushed myself.
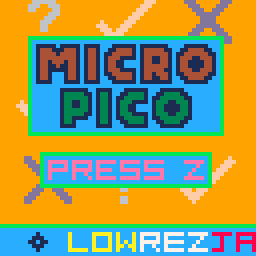
You can play the game on itch.io or the PICO-8 forum and check out the comments on my Ludum Dare entry page. If you liked reading this you might also like these posts about PICO-8 projects such as Ludum Dare 34, LowRezJam 2016 and tweetjam.
Larry Chupacabra and Jupiter Hadley recorded their playthroughs and these were great to watch. Larry really went to town on the improvisations and acting, which was cool. I especially loved hearing Jupiter start out picking the 'correct' options and then start to realize she can say whatever she wants and start to laugh and have fun with it. That's exactly what I was going for.
Overall I'm very happy with the game. Both the art and writing were big new challenges that I really wasn't sure I could do. The Museum was the first idea I really liked based on the theme but I didn't think I could pull it off, so I carried on brainstorming. I'm glad I went back to it and pushed myself.
You can play the game on itch.io or the PICO-8 forum and check out the comments on my Ludum Dare entry page. If you liked reading this you might also like these posts about PICO-8 projects such as Ludum Dare 34, LowRezJam 2016 and tweetjam.


 RSS Feed
